

This is a placeholder text
Group text


by Sunsilver on 20 June 2009 - 15:06
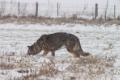
Don't mind me, just checking out the 'upload photo' feature, because it can be such a royal pain sometimes!
(If you want to LOL Cat this photo, feel free!)

(If you want to LOL Cat this photo, feel free!)
by Sunsilver on 20 June 2009 - 15:06
Okay, that was uploaded from Photobucket:
Selected a photo from Photobucket (if you don't know how to use Photobucket, I suggest you learn!)
Copied the 'direct link' from the list of options photobucket provides for sharing photos. (You get this either by mousing over the thumbnail, or by looking at the list given beside the full sized photos.)
(Do NOT copy the URL given at the top of the page!)
Selected the mountain and sun icon on PDB, clicked on it
Pasted the link from photobucket into the window that's titled "Image Properties"
Selected 'okay'
If you want to resize your photo:
I did exactly the same as above, but after clicking on 'okay', I right-clicked on the photo, and selected 'Properties'. This gave me a box that included the photo's width and height. I entered 400 (for 400 pixels) in the 'width' window, and the 'height' window resized automatically to keep the photo in proportion!
(There's a lot of people on the PDB that need to learn to use the 'resize' feature, so the poor dialup users don't go crazy waiting for photos to load!)
by Sunsilver on 20 June 2009 - 15:06
Okay, uploading from my computer (a little more complicated!)
Here's a favourite old picture of the gal in my avatar....
.jpg)
So, again,
1) Click on the mountain/sun icon
2) Under Image Properties, you will see several buttons. Select the one that says "Upload Photo.
3) Select the "Browse" button in the window that pops up, then locate the image on your computer
4) Left click directly on the photo, and its address will show up in the window.
5) Underneath that window is a button that says 'send it to the server'. Left-click on that, and wait for the photo to upload. The larger the photo, the longer the wait.
6) You will eventually get a popup that says your upload is complete, followed by a photo editing screen.
7) Check the size of your photo in that screen. If it is too large (over 600 pixels in height or width), RESIZE IT by selecting a smaller figure. The photo above is around 400 pixels wide.
8) Press 'okay'
9) If posting several photos, PLEASE MAKE SURE TO INSERT A LINE BETWEEN THEM!! Otherwise, they will all post in a straight line, and stretch the page sideways! (To do this, you hit the 'enter' key on your keyboard a couple of times (DUH!))
Here's a favourite old picture of the gal in my avatar....
So, again,
1) Click on the mountain/sun icon
2) Under Image Properties, you will see several buttons. Select the one that says "Upload Photo.
3) Select the "Browse" button in the window that pops up, then locate the image on your computer
4) Left click directly on the photo, and its address will show up in the window.
5) Underneath that window is a button that says 'send it to the server'. Left-click on that, and wait for the photo to upload. The larger the photo, the longer the wait.
6) You will eventually get a popup that says your upload is complete, followed by a photo editing screen.
7) Check the size of your photo in that screen. If it is too large (over 600 pixels in height or width), RESIZE IT by selecting a smaller figure. The photo above is around 400 pixels wide.
8) Press 'okay'
9) If posting several photos, PLEASE MAKE SURE TO INSERT A LINE BETWEEN THEM!! Otherwise, they will all post in a straight line, and stretch the page sideways! (To do this, you hit the 'enter' key on your keyboard a couple of times (DUH!))
by steve1 on 20 June 2009 - 18:06
SunSilver
Many thanks but i think some thing is not right with my setup on the computer, i will print your instructions off for the furure in the meantime i think i will have to get the shop to check my computer out
Steve
Many thanks but i think some thing is not right with my setup on the computer, i will print your instructions off for the furure in the meantime i think i will have to get the shop to check my computer out
Steve
Contact information Disclaimer Privacy Statement Copyright Information Terms of Service Cookie policy ↑ Back to top